
HOW TO SETUP STUDENT ACCOUNTS
Log into your EDUCATION.WEEBLY.COM account.
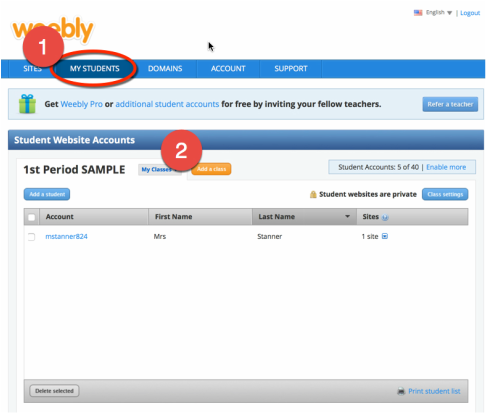
1. From your sites page, look at the main menu tab for MY STUDENTS. Click on that.
2. IF you have not created your Class on the SITES main page, you may do so here. Simply click on ADD A CLASS.
.
1. From your sites page, look at the main menu tab for MY STUDENTS. Click on that.
2. IF you have not created your Class on the SITES main page, you may do so here. Simply click on ADD A CLASS.
.
|
3. Click on the CLASS SETTINGS Tab. - Note all of the settings you can control! - Note this is also where you can DELETE CLASSES, for future reference 4. Click on MY CLASSES to select the class you'd like to add students to...
5. Now, select the ADD A STUDENT tab. You have TWO options to add students. - Add Individuals - Upload a spreadsheet. CREATING INDIVIDUAL STUDENT ACCOUNTS EASY! Once you clicked on the ADD A STUDENT tab in Step 5, the text boxes to enter that information are revealed. Simply enter information into the text boxes. |


|
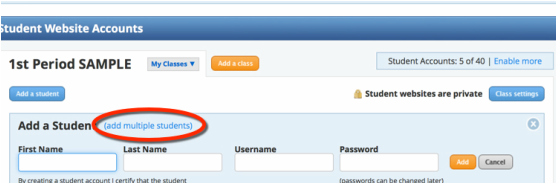
ADDING MULTIPLE STUDENTS
To the left of "Add a Student" tab, click on link (add multiple students)
Next, you have two options for adding multiple students.
OPTION 1:
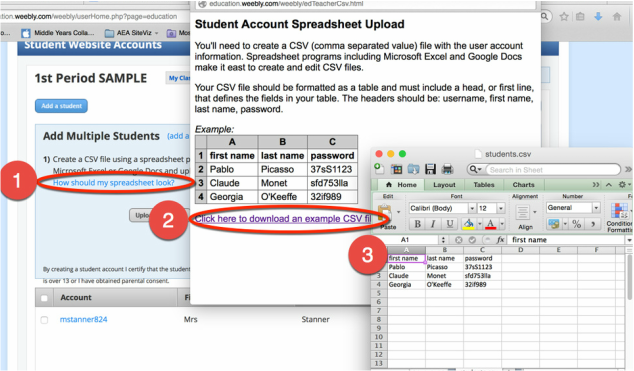
1. Click on the link "How should my spreadsheet look?"
2. Directions will pop-up. You might then click link beneath the table to download the sample spreadsheet.
3. Use that sample spreadsheet to enter your student information.
4. Save information.
1. Click on the link "How should my spreadsheet look?"
2. Directions will pop-up. You might then click link beneath the table to download the sample spreadsheet.
3. Use that sample spreadsheet to enter your student information.
4. Save information.

5. Then click on UPLOAD A CSV file.
6. Locate that student account spreadsheet. Upload.
6. Locate that student account spreadsheet. Upload.
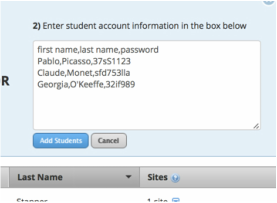
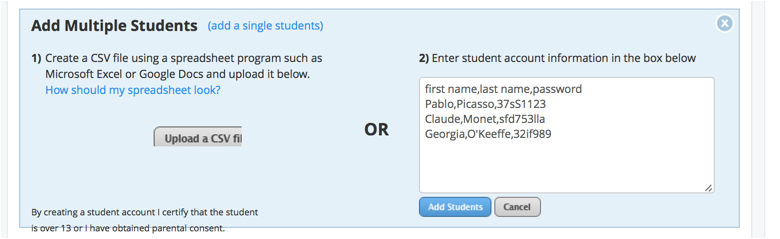
OPTION 2: Enter that student information directly into the text box. The format must be: first name, last name, password. TIP: Create that information in a doc first, then copy and paste in...
Print student account information.
|
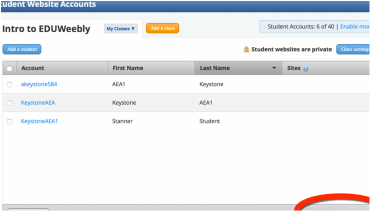
1. AFTER your student accounts are created, you will see your class roster. 2. Look to the bottom-right side of that student account screen. You'll see PRINT with a printer icon. Click on it. |
|
|

3. You'll now see your student account list. PRINT that list, cut on dotted lines for quick distribution to students.
NOTE: Although you can save the list as a PDF file, you don't need to do so. Students can (and should!) change their passwords, so the list can change a bit. However, teachers can easily modify, change, and access student sites in this same window. See MANAGING STUDENT SITES page for more information.
